Yin yoga is a slow moving and deep practice where postures are held for up to three minutes (sometimes more!) in order to get deeper into hard-to-get muscles and connective tissues. It is my go to yoga practice when I am sore from long or hard runs (like I am today). The benefits of this yoga are endless. Aside from just the stretchy goodies, you are also able to connect a little deeper to the breath, to your body, and to your mind. This all sounds nice and all, but yin yoga is often overlooked by runners because it is a little uncomfortable, especially for those who struggle with flexibility. It is important to remember that the more uncomfortable a posture is, the more we should be doing it. That does not mean that your practice should be painful. Pain is a different sensation and we want to avoid that in our yoga practice. However, a little (or a lot) of discomfort can be good for us.
I have outlined a beginner friendly yin practice that can be done by any inflexible, running yogi. This sequence concentrates a lot on the outer hips, IT band and hamstrings, which are all areas that need some extra love when you run. You’ll need a space without distraction, a relaxing music playlist, a strap, towel or belt, and a timer. Pillows, blankets and blocks can also be helpful, especially if your knees tend to give you trouble. Each posture will be held for three minutes, which you can time either through songs on your playlist or on a phone timer. Carve out about 45 minutes for this practice (this is very short for a yin practice, so feel free to hold the postures longer and take more time, too). This is a perfect practice after hard or long run day for recovery.
Start on the spine in supine bound angle pose. To get into this posture, get nice and comfortable on your back, then bend your knees and bring your feet together with the knees out. Bring your right hand to rest on your stomach and your left hand to rest on your heart. Remain here with the eyes closed and just breath. Try to lengthen your breath and use your hands to feel the breath entering and exiting the body.

After a few minutes in this pose, stretch the body out, point and flex your toes and take a few deep breaths. Release the arms to the sides of the body with the legs extended on your mat. Bend your right knee, place the foot on the inside of the left leg and allow the right knee to fall out to the side. Then, reach your right arm up over your head as far as you can, trying to lengthen the right side of your body. Reach your right arm over towards the left side of your mat until you feel sensation in the right side of your body. If your right knee is uncomfortable, place a block or pillow under it. After a few minutes here, switch sides.

Again, take a moment to stretch the body out before jumping into the next posture. Then, you are going to come into a simple cross-legged position, but while still on your back. Start with your right shin in front of the left. If this hurts your knees, takes blocks or blankets under them to elevate a little. If you have tight hips, this will be a little uncomfortable for you. Release your ams to your sides and just breath. Be sure to do this on both sides.

Hug your knees into your chest, maybe draw opposing circles with the knees. Then, place your feet on to your mat at mat width with your knees up. Just allow both legs to fall over to the right side. Reach your left arm overhead, turn your head to the right and just relax into the posture. As always, blocks or pillows can be used under the knees if there is any pain there. When your are done, switch sides.

Place both feet on the mat with the knees up and grab your strap, belt or towel. Sling your strap around the ball of your right foot while holding each side of the strap in one hand. Extend your leg into the air, flex the foot and pull gently on the strap. You should feel a pretty deep stretch in your hamstring and in your calf. If you start to feel this in your lower back, or if the stretch is too intense, bend your extended knee a little. Repeat on the left side.

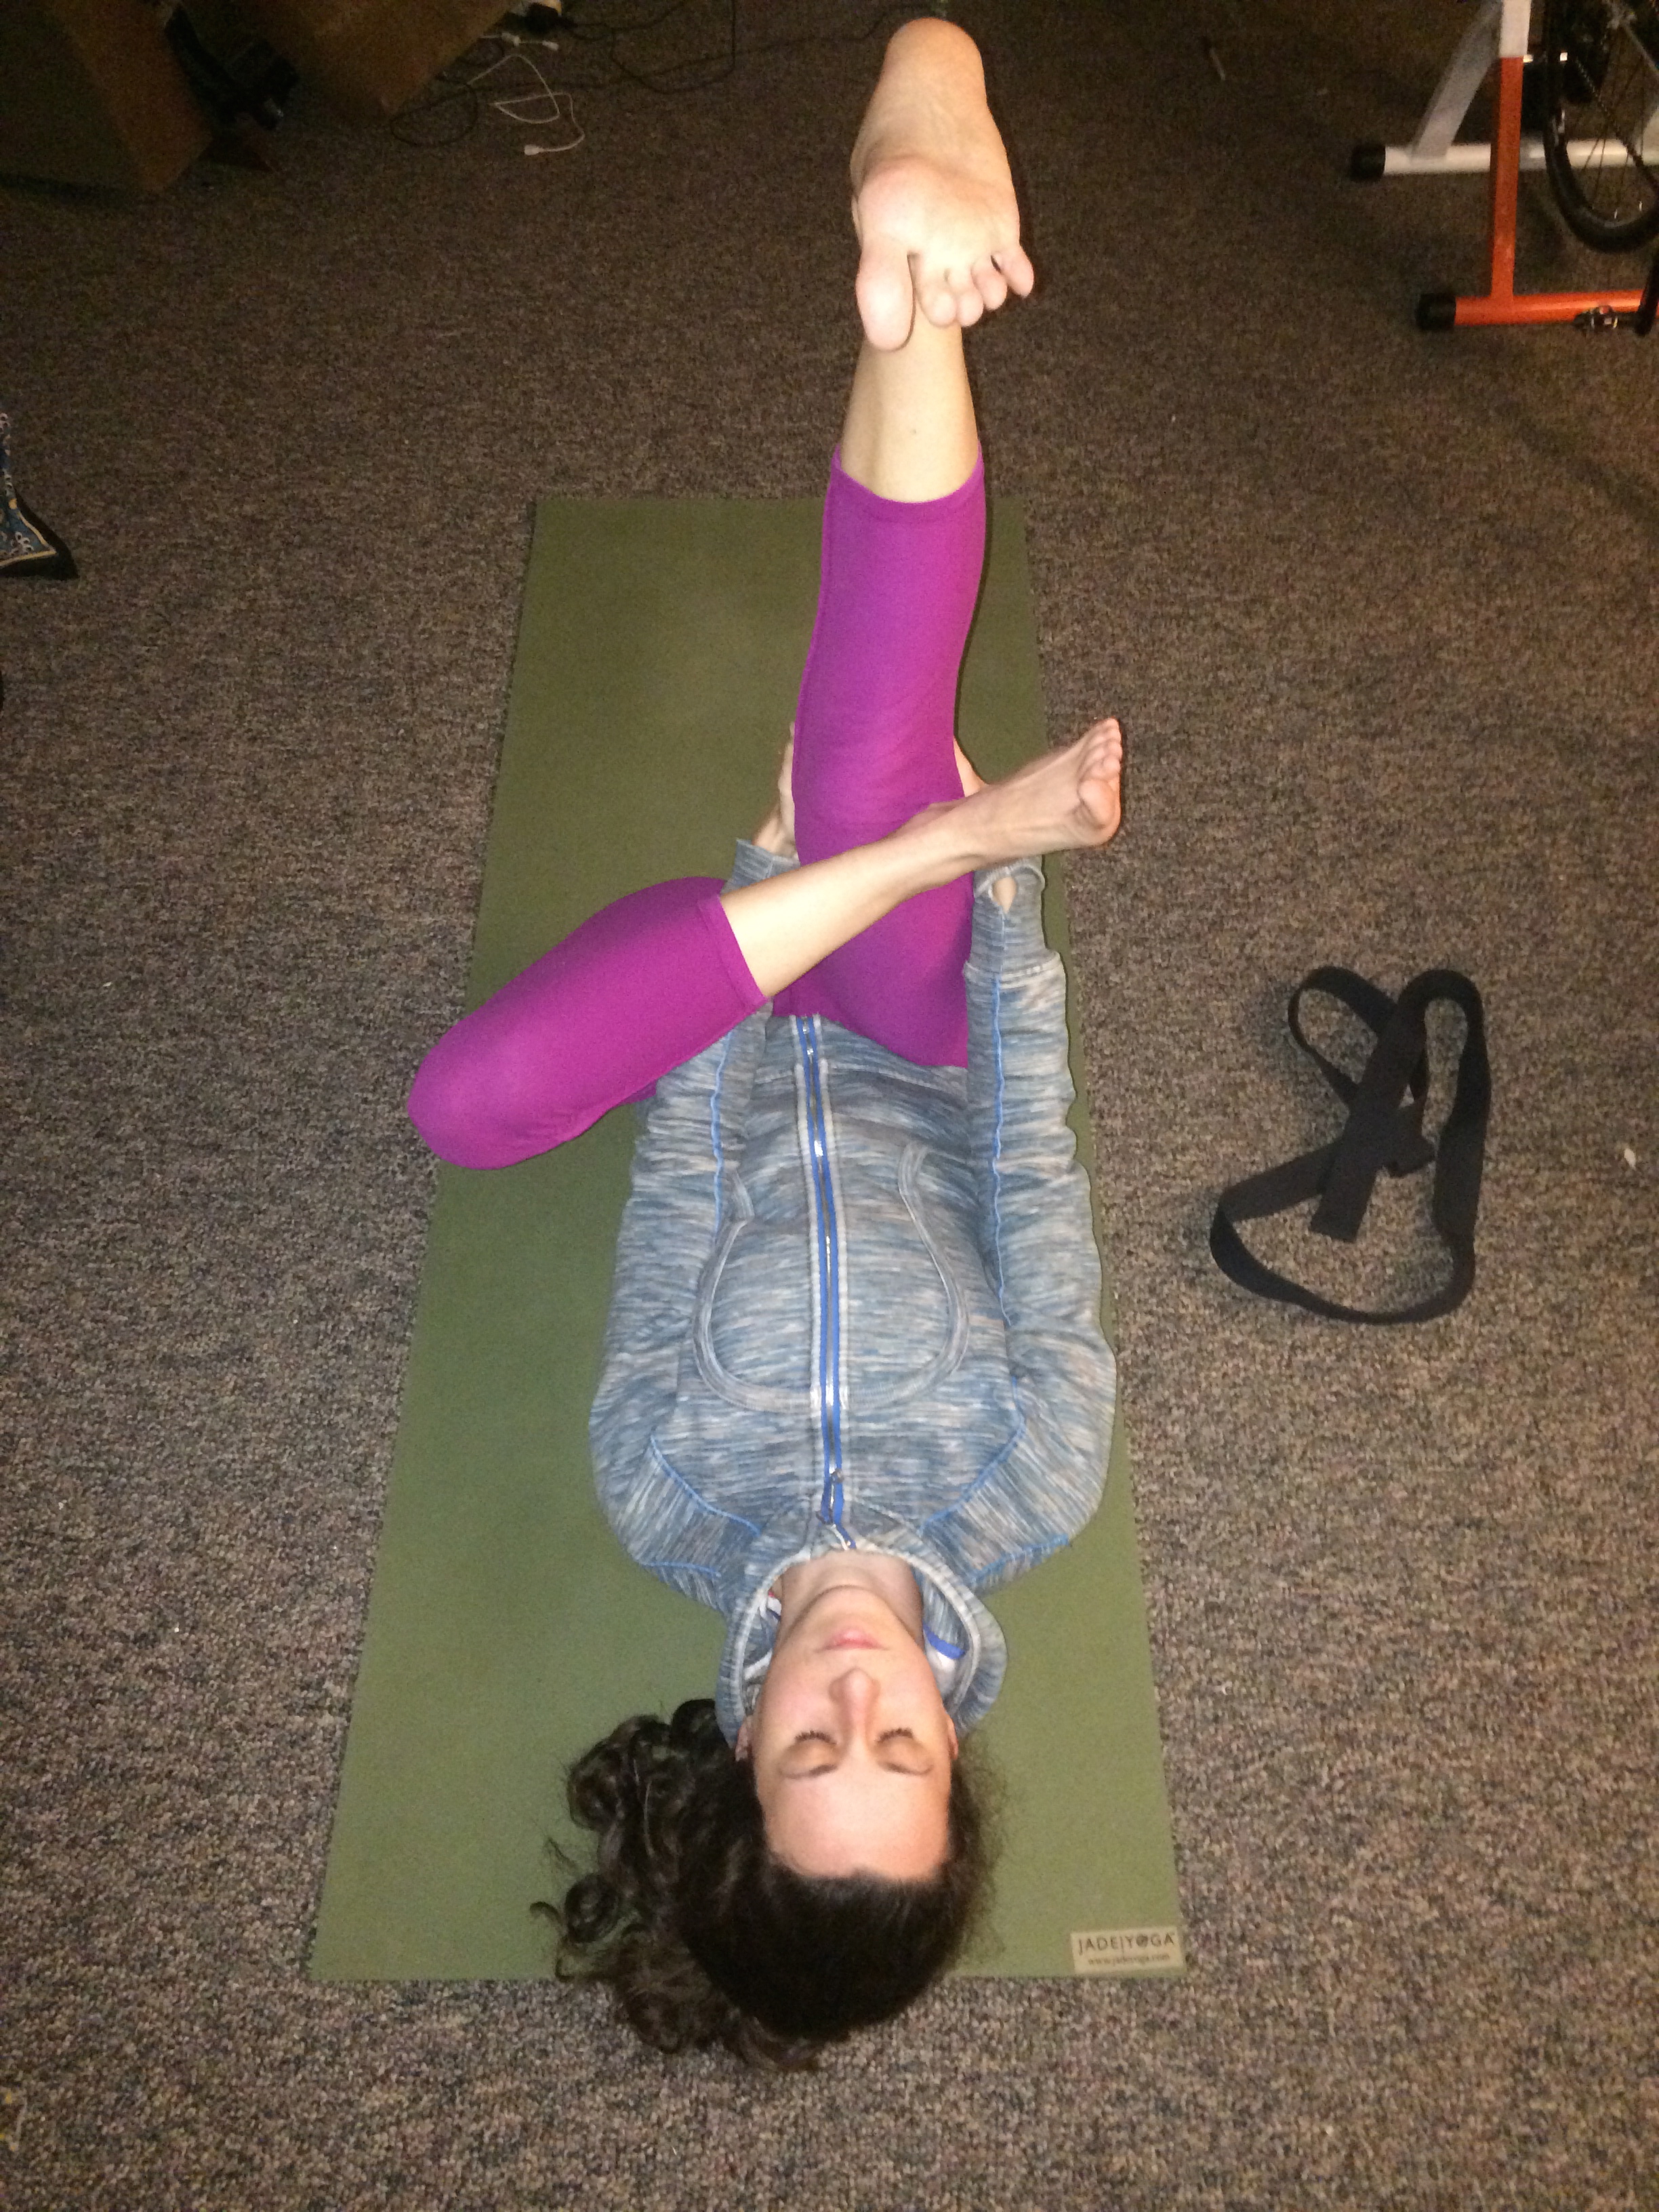
So, throughout this practice we’ve been working on external hip rotation and on IT band and hamstring stretches. This posture is what we have built up to. Start with both feet on the mat and the knees up. Take your left ankle on to your right knee so that the left knee opens out. Then, left your right knee, drawing it in towards your chest and take your left arm through the hole you made with your left leg and your right arm around your right leg. Lengthen your right leg into the air and clasp your hands on your thigh. If this stretch is a little too much, loop a strap, belt or towel around your right thigh and pull it in. Flex the right foot and try to relax through your face, neck and shoulders. Try to hold this one for the whole three minutes and then switch sides.
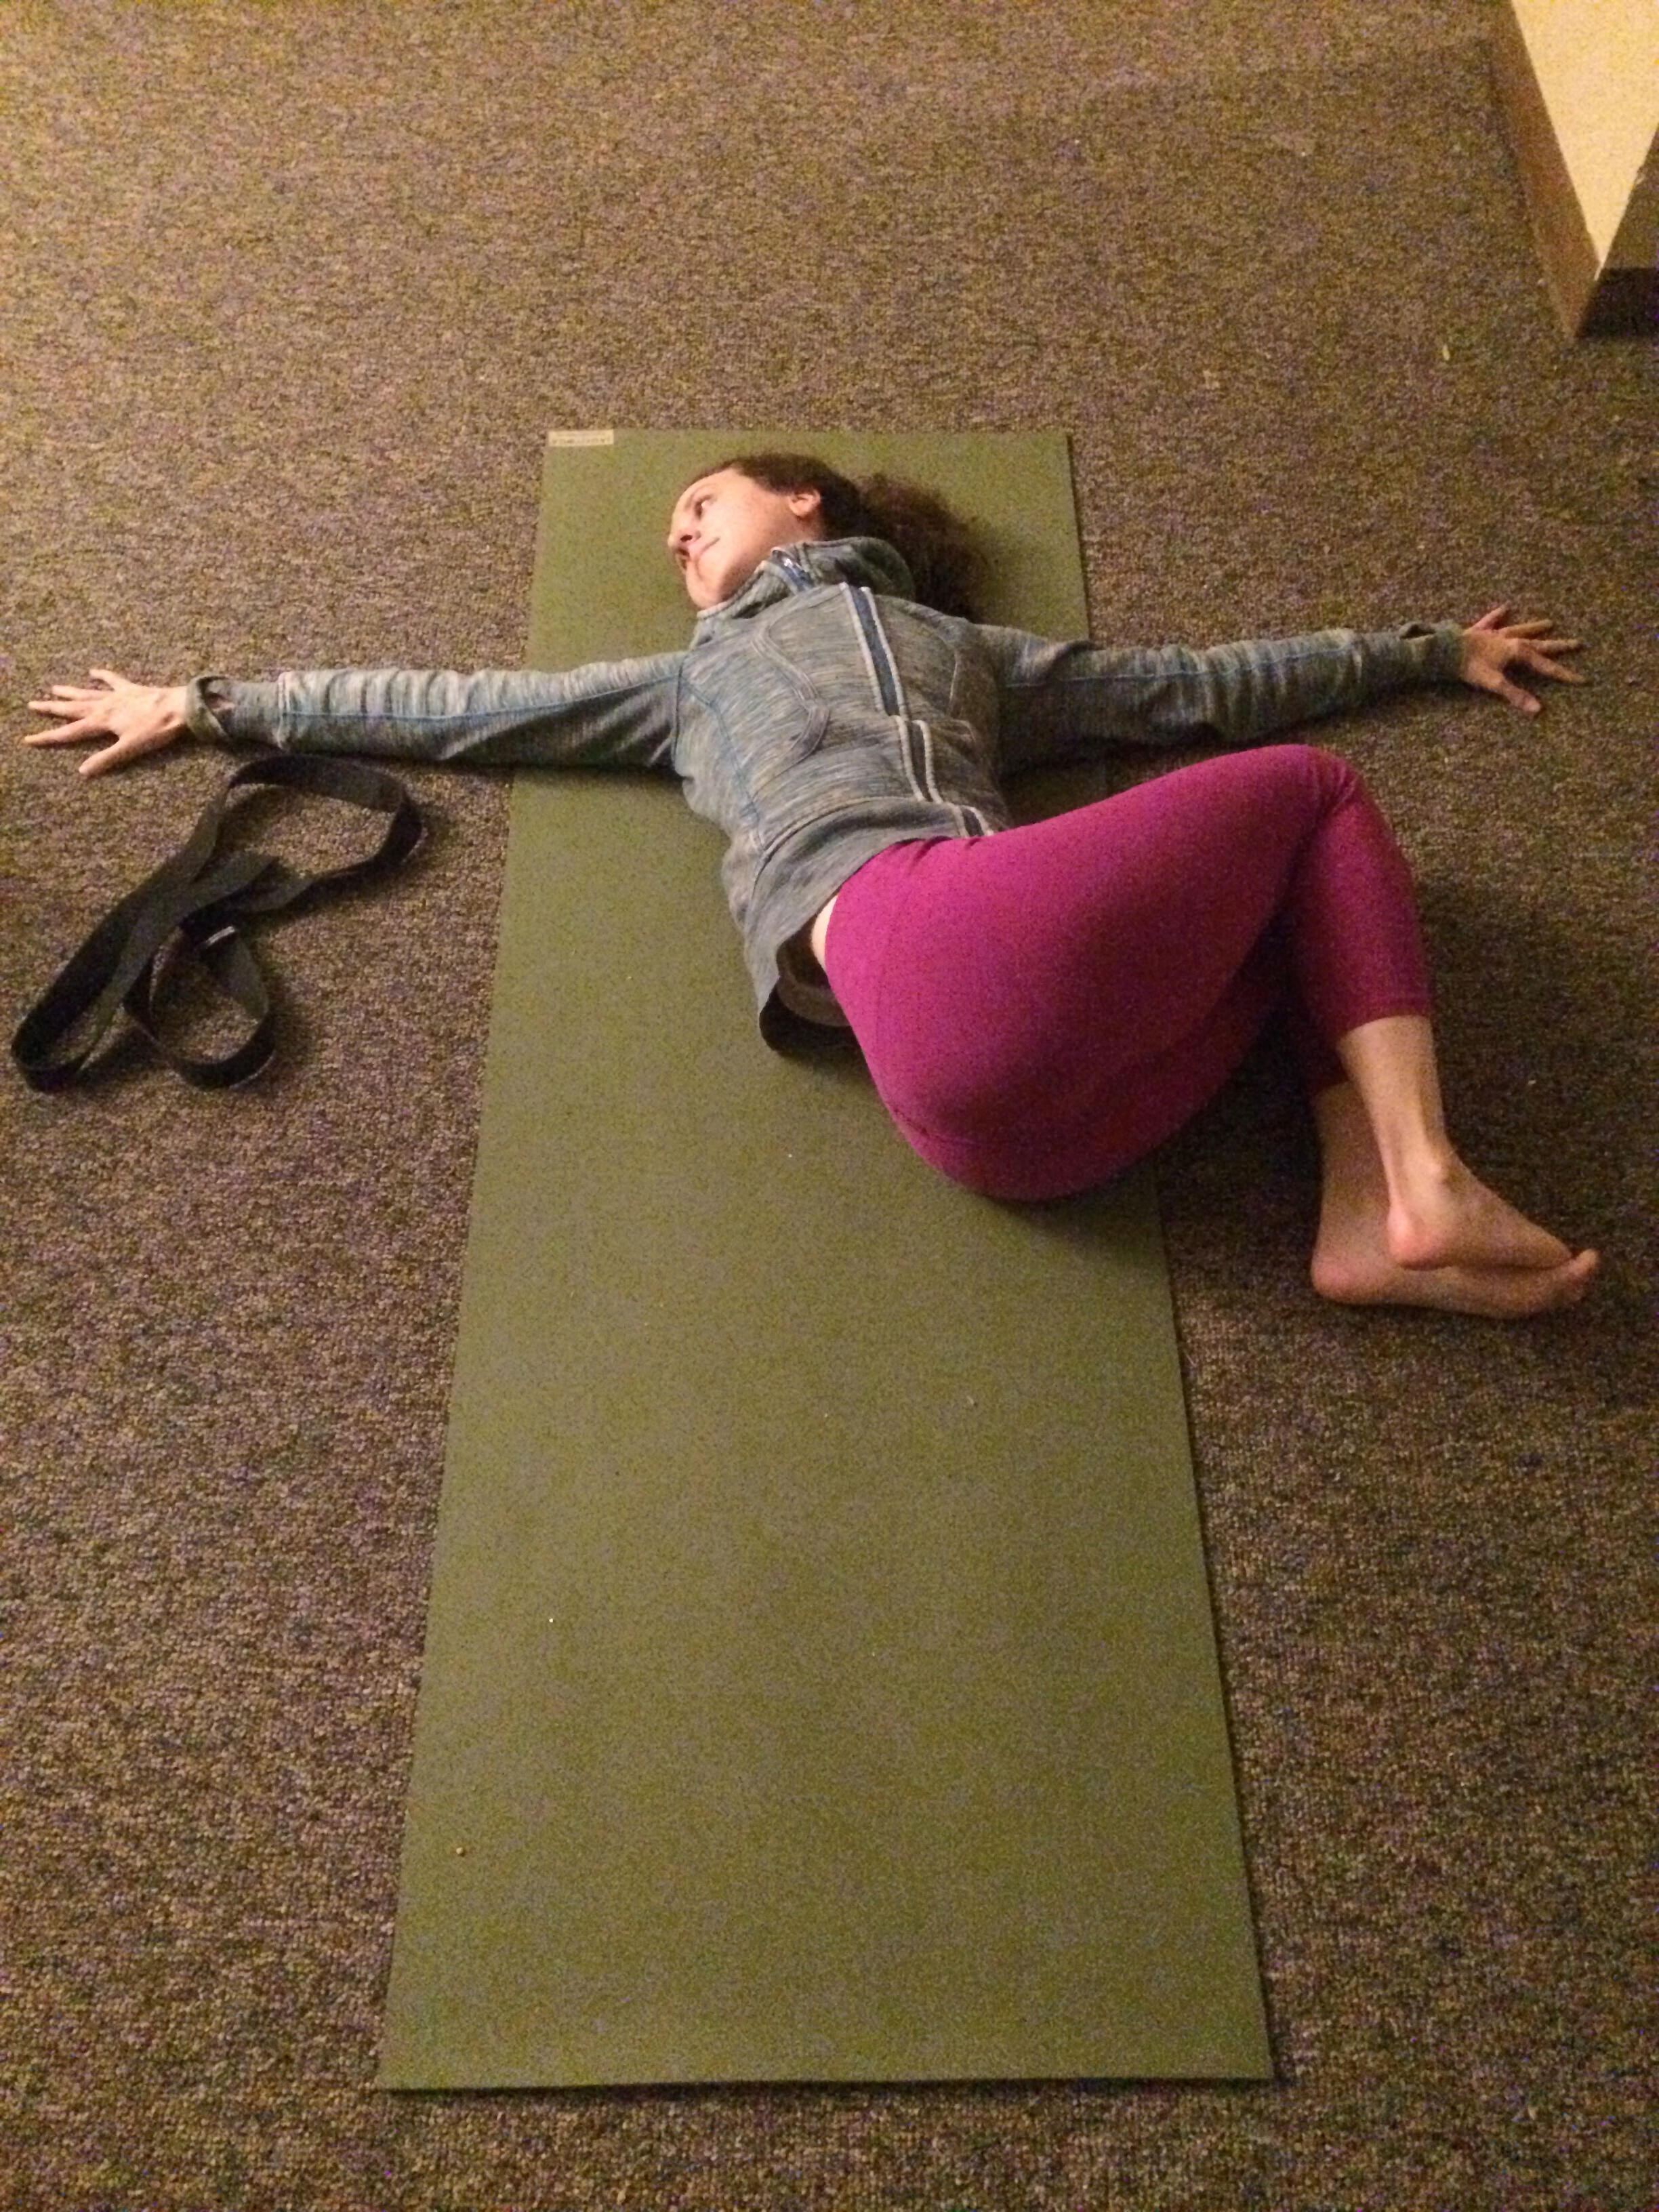
When you are done, hug your knees into your chest and open your arms out to a “T” position. Allow both legs to fall all the way over to the right side while keeping the left shoulder on the ground. Turn your head to look over your left shoulder. Switch sides. When you are done, take a moment to just lay comfortably on your spine and breath. Notice how your body feels after taking some time to slow down and relax.
I hope you enjoy this yin practice. If you are unable to carve out a full 45 minutes for this, try holding each posture for just 60 seconds. It is incredibly important to take some time to rest, slow down and connect. If you have any questions let me know! Namaste. 🙂

I love that you wrote about YIN. I tried this style of yoga for the first time last year and was quite literally blown away. I had always considered this ‘old lady yoga’ and had a preference for the ashtanga and vinyasa styles. What I discovered is that there is sometimes more work and benefit from stillness in motion than constant motion.
As I am now training for triathlon and certainly don’t need any more intense workouts, I find I am once again drawn to yin for its restorative properties. Thank you for posting – I am eager to try your suggestions later today 🙂
LikeLiked by 1 person
I certainly agree. I was pretty hesitant to start a yin practice because I thought it was a waste of time and that vinyasa was more well suited to my body. However, a lot of times, I simply need something that is quieter and doesn’t force me to overwork. It also keeps me a lot more limber, especially after hard workouts. Glad to hear you enjoyed my post! 🙂
LikeLiked by 1 person